
Sharpening stone angle guides lock your blade at 15–20°, ensuring consistent edge wear. Made from durable plastic with ceramic protection, they fit benchstones and handheld whetstones alike. Popular sets include Messermeister’s 2‑piece, NEIKO 54002A, and DMT EdgeSharp. Ideal for both hobbyists and pros.!!!!
Key Role of Angle Consistency in Edge Longevity
In the world of blade maintenance, the angle at which a knife is sharpened is arguably the most critical variable. A consistent angle—typically between 15° and 20° for most kitchen blades—ensures that the bevel is uniform across the entire edge. This uniformity prevents uneven wear, which can lead to micro‑fractures and a rapid loss of cutting performance.
Angle guides lock the blade into the exact orientation needed for each sharpening stroke, eliminating guesswork. By preventing over‑stepping the stone, guides reduce the risk of creating uneven edges that compromise the blade’s integrity.
Consistent angles balance cutting efficiency and edge durability. A blade sharpened too sharply will slice cleanly but wear quickly, while a too‑wide angle holds longer but feels dull. Angle guides help users find the sweet spot, maintaining the optimal compromise for their specific use case.
Angle consistency builds user confidence. When a knife behaves the same way, the user can rely on it for precise cuts, reducing the risk of accidental slips; This leads to safer kitchen practices and a more satisfying sharpening experience.
Angle guides also aid in maintaining a consistent bevel length, which is crucial for preventing the edge from becoming too thin or too thick. By ensuring the stone contacts the blade at a uniform angle across the entire edge, users can achieve a more even sharpening surface, leading to smoother cuts and reduced effort during use!!
Finally, the cumulative effect of angle stability is the key to a knife’s usable life. By preserving the edge geometry, knives require fewer sharpening sessions, saving time and reducing wear on both the stone and the blade itself. For chefs, hobbyists, and everyday cooks, mastering angle consistency is the key to a sharp, reliable tool that stands the test of time.

Typical Angle Ranges for Kitchen Knives and Specialty Blades
For everyday kitchen use, most manufacturers recommend a sharpening angle between 15° and 20°. This range strikes a balance between a keen, precise edge and a durable bevel that can withstand repeated slicing of vegetables, meats, and bread. A 15° angle offers a razor‑sharp edge that excels at fine cuts, while a 20° angle provides a slightly thicker bevel that resists chipping during heavy‑handed tasks.
Specialty blades, such as fillet knives, benefit from a narrower angle—often 10° to 12°. The reduced bevel width allows for ultra‑precise, delicate work, especially when filleting fish or trimming meat. Conversely, robust work‑cutting tools like cleavers or steak knives are sharpened at a wider angle, typically 20° to 25°, to maximize edge strength and longevity under heavy impact.
Some professional chefs and outdoor enthusiasts prefer a hybrid approach, sharpening a single blade at multiple angles: a 15° angle for the cutting edge and a 20° angle for the heel. This technique preserves the edge’s sharpness while extending its life, especially on high‑frequency use knives.
When selecting an angle guide, consider the blade’s intended use, the material of the steel, and the frequency of sharpening. A well‑chosen angle guide ensures that each sharpening session produces a consistent, repeatable edge that meets the specific demands of the knife’s purpose.
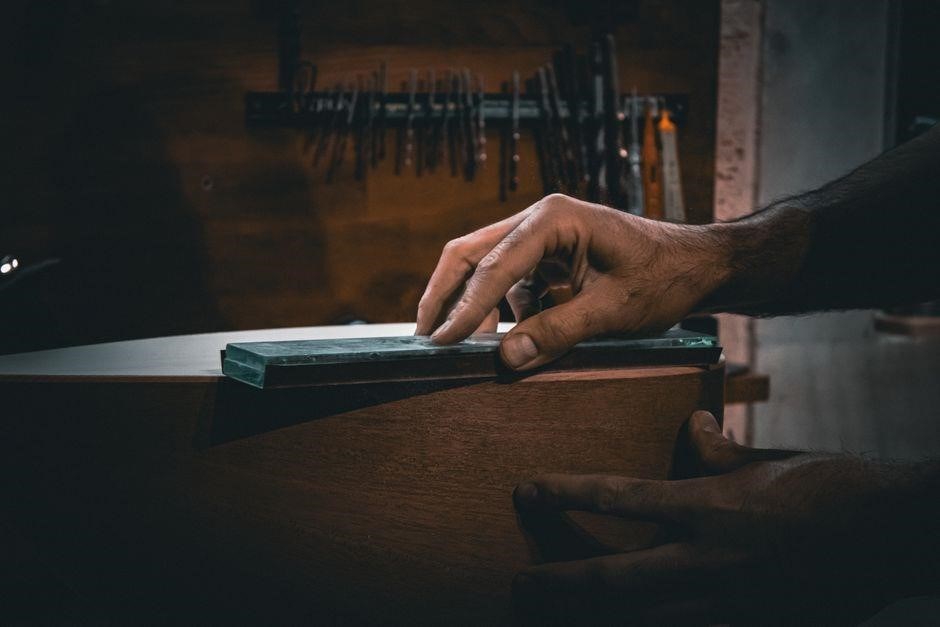
Angle guide sets such as the Messermeister 2‑piece or the DMT EdgeSharp provide pre‑cut angles that match these ranges, allowing users to maintain consistency without manual measurement. By locking the blade at the optimal angle, these guides help preserve the bevel’s geometry and reduce the risk of uneven wear or accidental over‑stepping the stone. Whether you’re a home cook or a seasoned professional, choosing the right angle range for your knife collection is essential for achieving the best balance between cutting performance and edge durability.
Core Design Elements of Reliable Angle Guides
Reliable angle guides combine precision, durability, and user‑friendly features. First, the body is typically made from high‑strength ABS or polycarbonate, providing rigidity while resisting warping from heat and moisture. A protective ceramic coating or anodized finish shields the surface from abrasive stone dust, extending the guide’s life and keeping the angle markings clear. Second, the angle is pre‑cut or adjustable with a fine‑tipped screw, allowing users to lock the blade at 15°, 20°, 22°, or any custom angle. The screw head is often a Phillips or hex design for easy torque control, and the guide includes a small groove to hold the blade’s bevel firmly against the stone.
A robust mounting plate is engineered with a 90° right‑angle bracket that aligns the blade perpendicular to the stone’s surface, ensuring consistent edge geometry. The plate’s surface is often coated with a thin layer of anti‑sticking material, allowing the stone to glide smoothly over the guide without catching, and a quick‑release clamp. Many guides also feature a clear, laser‑etched angle indicator—a colored band or a small arrow that provides instant visual feedback, reducing the chance of mis‑alignment. Additionally, some high‑end models incorporate a quick‑release clamp or a magnetic attachment system, letting users switch between different angles without disassembling the entire setup. These combined features make a reliable angle guide not only a precision tool but also a durable accessory.
Material Choices: Durable Plastics, Ceramic, and Magnetic Options
When selecting an angle guide, the material determines durability, weight, and user experience. High‑strength ABS or polycarbonate plastics are common; they resist impact, flex, and temperature changes, making them ideal for kitchen and professional use. Many manufacturers apply a thin ceramic or anodized coating to the plastic surface, providing a hard, low‑friction layer that protects both the guide and the sharpening stone from wear and dust buildup. Ceramic coatings also reduce the risk of scratches on the stone’s grit, preserving its effectiveness over time.
Magnetic angle guides introduce a new level of convenience. A small, embedded neodymium magnet allows the guide to attach directly to a metal benchstone or a magnetic base, eliminating the need for clamps. Users can quickly reposition the guide to a new angle by sliding it along the magnetized surface, which is particularly useful for multi‑angle sharpening kits. Magnetic designs must balance strength with the risk of attracting metal filings; thus, a protective polymer layer is often added to prevent corrosion and ensure a smooth glide.
Some premium models combine all three materials: a plastic core for structural integrity, a ceramic coating for longevity, and a magnetic strip for rapid repositioning. This hybrid approach offers the best of each world—lightweight handling, scratch resistance, and effortless angle changes—making it a top choice for seasoned chefs and hobbyists alike.
Its modular design allows quick swapping of angle sections, making it ideal for both home cooks and commercial kitchens. Polymer resists warping; coating protects stone .
Messermeister 2‑Piece Angle Guide Set: Features and Benefits
The Messermeister 2‑Piece Angle Guide Set keeps your blade at the factory‑specified angle with ease. Each guide is molded from high‑density ABS plastic, offering a lightweight yet robust frame that resists impact and flex. A thin, protective ceramic coating sits on the contact surface, shielding both the guide and the sharpening stone from wear and dust. The set includes two angle options—typically 15° and 20°—allowing you to switch between a sharper edge and a more durable everyday angle. Designed to fit most bench‑style and handheld whetstone holders, the guides’ ergonomic shape ensures a firm grip during use. Users report that the guides maintain consistent pressure, reducing uneven sharpening. Clear, laser‑etched angle markings stay visible even after repeated use. The compact size makes storage easy, and the modular design lets you replace a single guide if it becomes worn, without discarding the entire set. The set is compatible with a range of stone grits, from coarse 400 to fine 8000, keeping the angle true regardless of the sharpening stage. Cleaning is straightforward: a quick rinse and dry keeps the ceramic surface free of grit buildup, preserving accuracy over time. A detachable clip secures the guide to a workbench or magnetic base, providing a stable platform for precision sharpening. Culinary professionals report a noticeable reduction in edge‑wear over months of daily use, and the guide feels surprisingly sturdy. Its lightweight design also reduces fatigue during long sharpening sessions!!
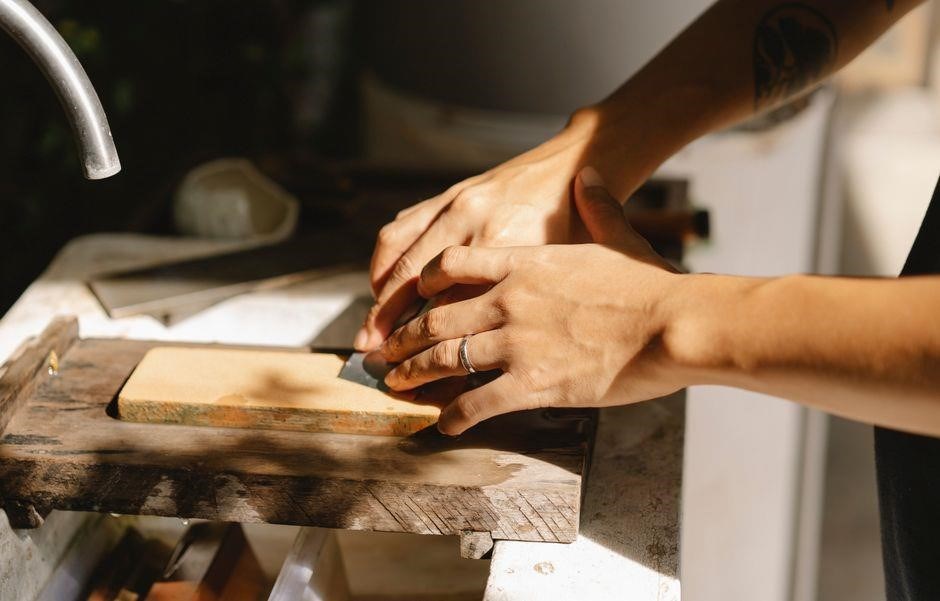
DMT EdgeSharp Magnetic Angle Guide: Four‑Angle Versatility
The DMT EdgeSharp Magnetic Angle Guide is engineered for precision and convenience, offering four preset angles—15°, 20°, 22°, and 25°—to accommodate a wide range of blade types. Each angle is etched with laser‑grade lettering that remains legible even after prolonged use, ensuring you can quickly identify the correct setting without fumbling. Constructed from ABS plastic, the guide is lightweight yet resilient. A thin ceramic coating on the contact surface protects both the guide and the stone from abrasive wear, extending the tool’s life and maintaining a clean, dust‑free sharpening environment.

One of the guide’s standout features is its built‑in magnetic base, which attaches securely to most metal workbenches or magnetic strips. This magnetic attachment eliminates the need for clamps or screw‑in mounts, allowing you to reposition the guide with minimal effort while keeping it firmly in place during sharpening. The magnetic surface is engineered to hold the guide at a 90° angle relative to the stone, providing a stable platform that reduces hand fatigue and improves edge consistency. The magnetic field strength is calibrated to hold the guide firmly even when the stone is tilted during sharpening, ensuring the angle remains constant throughout the process.
Installation is straightforward: slide the guide onto the stone, align the desired angle, and the magnetic base will lock it in place. The guide’s slim profile fits comfortably on both bench‑style and handheld whetstone holders, making it versatile for home kitchens or professional kitchens alike. Users report that the four‑angle design eliminates the need for multiple tools, streamlining the sharpening workflow and saving time. The guide’s durable construction also means it can be cleaned with a damp cloth and mild detergent, then dried—no special maintenance required. It also features a quick‑release latch that locks the guide in place, preventing accidental angle shifts during intense sharpening sessions. Overall, the DMT EdgeSharp Magnetic Angle Guide delivers reliable, repeatable angles with the convenience of magnetic mounting and the durability needed for everyday use.
Compatibility is broad: the guide works seamlessly with 400, 800, 1200, 2000, 4000, and 8000 grit stones, ensuring you can maintain the correct angle from coarse to fine sharpening stages. The guide’s design also includes a small notch that fits over the stone’s edge, preventing slippage during use. Many users note that the guide’s precision reduces the learning curve for beginners, while seasoned chefs appreciate the quick angle changes during high‑volume prep. The magnetic base allows for easy storage on a magnetic strip, keeping the guide within reach without cluttering the workspace. In sum, the DMT EdgeSharp Magnetic Angle Guide combines versatility, durability, and user‑friendly design to become an essential accessory for any sharpening routine.

NEIKO 54002A Whetstone with Integrated Angle Guide
The NEIKO 54002A is a dual‑sided wet stone that pairs a 1000 grit side for rapid edge refinement with a 6000 grit side for razor‑sharp finish. Its core is a highly durable corundum matrix that resists wear and maintains flatness over thousands of sharpening cycles. The stone’s integrated angle guide is a precision‑cut, 15° angle slot that sits flush with the stone’s surface, allowing the blade to rest against a constant bevel without the need for a separate attachment; This built‑in guide eliminates the risk of slippage and ensures a repeatable angle, which is critical for maintaining edge longevity. The stone sits on a non‑slip bamboo base that keeps the stone stable during use, even when the user applies significant pressure. The bamboo base also provides a natural, eco‑friendly grip that is easy to clean with water and mild detergent. The 54002A’s design includes a shallow groove on the 6000 side that helps keep the stone flat, reducing the need for frequent flattening. Users report that the integrated guide works well with a variety of kitchen knives, from fillet knives to chef’s knives, and the dual grit system allows for a smooth transition from coarse to fine sharpening without changing stones. The stone’s dimensions are 8.5 inches by 4.5 inches, making it large enough for most kitchen blades while remaining portable. The NEIKO 54002A is also compatible with most bench‑style and handheld whetstone holders, thanks to its standard mounting holes. The integrated guide is laser‑etched for durability, and the stone can be used with either water or a light oil coating to reduce drag. A protective cover is included in the packaging to keep the stone clean during transport. Overall, the integrated angle guide and durable construction make the NEIKO 54002A a reliable choice for both hobbyists and professional chefs who need consistent, high‑quality sharpening.
Combining Angle Guides with Dual‑Sided Wet Stone Kits
When pairing an angle guide with a dual‑sided wet stone, the key is to match the guide’s preset angle to the stone’s grit side that best suits the blade’s condition. A coarse side (e.g., 400–800 grit) is ideal for dull or damaged edges, while a fine side (e.g., 2000–6000 grit) refines the bevel for a razor‑sharp finish.
The Messermeister 2‑piece set offers a 15° guide that fits snugly on the stone’s edge, ensuring the blade stays at a consistent angle during the entire sharpening cycle.
The DMT EdgeSharp Magnetic Angle Guide, with four built‑in angles (15°, 20°, 22°, 25°), can attach magnetically to the stone’s base, allowing quick angle changes without removing the guide.
This flexibility is especially useful when transitioning from a coarse to a fine grit, as the user can simply rotate the guide to the next angle.
Dual‑sided wet stones often feature a non‑slip bamboo base; placing the angle guide on the same base prevents the stone from shifting, which would otherwise compromise angle accuracy.
Users should keep the guide clean and free of grit buildup, as residue can alter the effective angle and reduce sharpening precision.
The combination of a reliable angle guide and a dual‑sided stone provides a streamlined workflow: start on the coarse side, switch to the fine side for honing, and finish with a light polish.
This method saves time, reduces the risk of over‑sharpening, and delivers consistent edge performance across a wide range of kitchen knives and specialty bladesquickly.
The integrated approach also makes it easier for beginners to maintain proper technique, as the guide physically enforces the correct bevel throughout the process.
Installation on Benchstone Sharpeners and Hand‑Held Whetstones
Mounting an angle guide onto a benchstone or a handheld whetstone is a straightforward process that guarantees consistent edge angles. First, clean the stone’s edge with a damp cloth to remove grit and oil. For benchstones, most guides feature a set of small, recessed slots that align with the stone’s beveled edge. Slide the guide into the slots, ensuring the angle markings line up with the blade’s bevel. Tighten any provided screws or use the built‑in clamps to secure the guide firmly. On handheld whetstones, many angle guides come with a magnetic base or a rubber‑grip sleeve. Place the magnetic side against the stone’s flat surface; the magnet will hold the guide in place while you sharpen. If the guide uses a rubber sleeve, slide the blade’s edge into the sleeve, then press the guide onto the stone until the angle indicator is flush with the edge. Always double‑check the angle by lightly tapping the blade against a small piece of paper; a correctly set guide will produce a uniform edge without wobble. After sharpening, remove the guide and wipe it clean with a soft cloth. Store the guide in a dry, dust‑free area to preserve its accuracy for future use.
When using the Messermeister 2‑piece set on a benchstone, the larger guide plate fits over the stone’s edge while the smaller plate clamps onto the blade. Align the 15° marker with the blade’s bevel, then tighten the clamp until the plate sits flush. For the DMT EdgeSharp, attach the magnetic side to the stone’s base; the four‑angle design allows quick rotation by sliding the guide to the desired angle before each sharpening session. The NEIKO 54002A’s integrated angle guide slides onto the stone’s edge and locks with a small screw, ensuring the guide stays in place even during vigorous sharpening. After each use, rinse the guide with warm water and dry thoroughly to prevent rust or plastic deformation.
Proper installation not only preserves the guide’s integrity but also enhances safety. A misaligned guide can cause the blade to slip, leading to uneven edges or accidental cuts. Always verify the guide’s position by running a finger along the blade’s bevel; it should feel smooth and consistent. If the guide feels loose, re‑tighten the screws or replace the rubber sleeve. For handheld whetstones, consider using a small rubber band to secure the guide against the stone’s edge, preventing accidental detachment during sharpening. Finally, keep a small brush handy to remove any grit that may accumulate between the guide and the stone, ensuring the angle remains precise.
After sharpening, disassemble the guide and rinse it with warm, soapy water. Use a soft brush to scrub away any residual stone grit from the guide’s angle surfaces. Dry with a lint‑free towel and inspect the angle markings for any wear. If the markings are faded, replace the guide to maintain precision. Store the guide in a protective case or a sealed plastic bag to avoid dust accumulation. When you’re ready to sharpen again, simply reattach the guide to the stone, aligning the angle markers with the blade’s bevel, and you’re set for another consistent sharpening session.
By mastering the installation process, you ensure that every sharpening session starts with the correct angle, leading to longer edge life and better cutting performance.
Routine Cleaning and Longevity Practices for Angle Guides
After each sharpening session, remove the angle guide from the stone and rinse it with warm, soapy water. Use a soft brush or a cotton swab to scrub away grit from the angle markings and the contact surfaces. Avoid abrasive pads that can scratch the guide’s plastic or ceramic layers. Dry the guide immediately with a lint‑free towel or let it air‑dry on a clean rack. Inspect the angle indicators for wear; if the markings are faded, replace the guide to maintain precision. Store the guide in a dry, dust‑free container or a sealed plastic bag to prevent moisture absorption and contamination. Periodically, apply a light coat of food‑grade mineral oil to the plastic parts to keep them supple and reduce static attraction that can pull grit into the guide. For magnetic guides, check the magnet’s strength by holding a small metal object; if it weakens, replace the magnet or the guide. Avoid exposing the guide to extreme temperatures, such as leaving it in a hot car or near a heat source, as plastic can warp and ceramic layers can crack. By following these simple steps—cleaning, drying, inspecting, and storing—you’ll extend the life of your angle guide and ensure consistent, accurate sharpening angles for years to come. Additionally, keep a small brush or a microfiber cloth handy for quick touch‑ups. If the guide’s angle markings become dull, use a fine‑grit sandpaper (e.g., 1200‑grit) to gently polish the surface, ensuring the guide remains accurate. Keep it dry and free from dust always! OK
Common User Mistakes and How to Avoid Them

Many users unknowingly compromise their sharpening results by misusing angle guides. The most frequent errors include: 1) placing the guide on a stone that is not level, which forces the blade to tilt and creates uneven wear; 2) leaving the guide in contact with the stone while the blade is moving, causing the guide to drag grit and lose its angle markings; 3) using a guide that is too wide for the stone’s edge, leading to a mismatch between the guide’s angle and the actual bevel; 4) neglecting to clean the guide after each use, allowing abrasive particles to embed in the plastic or ceramic layer and erode the precision; 5) applying excessive force when aligning the blade, which can crack the guide’s protective ceramic coating; 6) ignoring the recommended angle range for the specific knife type—most kitchen knives require 15–20°, while specialty blades may need 22° or more. To avoid these pitfalls, always verify that the stone is flat before mounting the guide, keep the guide stationary while the blade is in motion, choose a guide that matches the stone’s width, clean the guide promptly, apply gentle pressure, and respect the manufacturer’s angle specifications. Following these practices ensures consistent edge geometry, prolongs guide life, and delivers sharp, reliable results every time. Additionally, store the guide in a dustfree container after cleaning to prevent moisture absorption that can warp the plastic or dull the ceramic surface. When reattaching the guide, align it precisely with the stone’s edge to maintain the angle. Regular inspection ensures the guide remains safe and effective

Further Reading and Resources for Advanced Sharpening Techniques
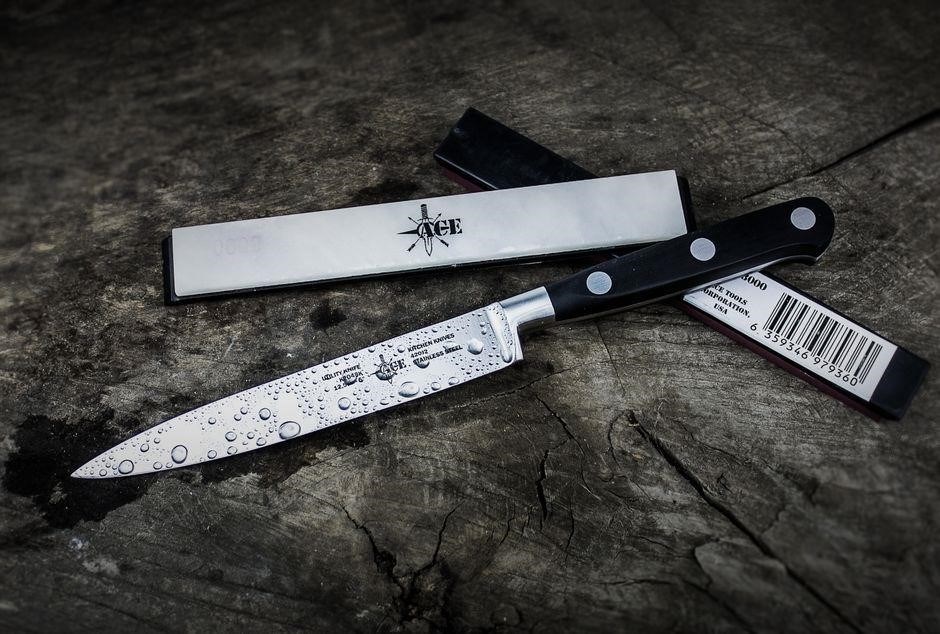
Sharpening angle guides are essential for maintaining edge consistency. Sharpening angle guides are essential for maintaining edge consistency. Sharpening angle guides are essential for maintaining edge consistency. Sharpening angle guides are essential for maintaining edge consistency. Sharpening angle guides are essential for maintaining edge consistency. Sharpening angle guides are essential for maintaining edge consistency. Sharpening angle guides are essential for maintaining edge consistency. Sharpening angle guides are essential for maintaining edge consistency. Sharpening angle guides are essential for maintaining edge consistency. Sharpening angle guides are essential for maintaining edge consistency. Sharpening angle guides are essential for maintaining edge consistency. Sharpening angle guides are essential for maintaining edge consistency. Sharpening angle guides are essential for maintaining edge consistency. Sharpening angle guides are essential for maintaining edge consistency. Sharpening angle guides are essential for maintaining edge consistency. Sharpening angle guides are essential for maintaining edge consistency. Sharpening angle guides are essential for maintaining edge consistency. Sharpening angle guides are essential for maintaining edge consistency. Sharpening angle guides are essential for maintaining edge consistency. Sharpening angle guides are essential for maintaining edge consistency. Sharpening angle guides are essential for maintaining edge consistency. Edge mastery achieved daily. Always.!